Some of the links in this post may contain affiliate links for your convenience. As an Amazon associate I earn from qualifying purchases.
Just before spring arrives, the snow melts, ice disappears, and we start getting multiple days over 32 degrees. Do you know what that means??? At my house, that means it’s maple syrup season, and I’m so glad I learned how to tap maple trees!
After living on my current property for about 18 years, I realized I had untapped resources right out in my own yard.
Really. My maple trees.
I could have kicked myself, thinking, “Why didn’t I ever take advantage of this”? So, last year, my friend, Bill, showed me how to do this, and now I’m going to share it with you so you, too, can learn a valuable skill and sweeten your preps.

How do I know which maple tree to tap?
One of the first things you should know is which trees are maples, because in the winter, they all look alike. Fortunately, any kind of maple tree can provide the needed sap. I happen to have one Red Maple, and the rest are Silver Maples. The Sugar Maple is the most desired because it has the highest sugar content. Its’ sap ranges from about 3-4% sugar. The Red Maple is about 2-3%, and my Silver Maples are only a measly 1-2%.
How much sap is needed to make a gallon of maple syrup?
Sap yield varies depending on tapping method, tree size, and environmental and seasonal variations. However, if you are lucky enough to have a Sugar Maple, it takes roughly 40 gallons of sap to make one gallon of syrup. So, I need a whole lot more sap from my Red Maple and Silver Maples to do the job.
My first year, I made 19 pints and 2 quarts. I like pint-size jars, so I could give those as gifts. I used my Mason jars, so I didn’t have to order fancy bottles online.
What time of year do you tap a maple tree?
In my area, tapping can begin in mid/late February to mid/late-March and could go on for a month! Your location and weather conditions are going to determine when tapping begins for you. You don’t want to tap too early, otherwise, the sap could prematurely dry up. Just remember two things:
- Daytime temperatures need to be above freezing for about 5 days.
- Nighttime temperatures need to be below freezing for the same time period.
Also, if this will be your first time tapping, now is a great time to order supplies.
What supplies do I need to get started tapping maple trees?
Being the good friend he is, Bill supplied me with everything I needed, except the trees!
- Several 6-gallon plastic buckets with lids
- 3/8″ plastic tubing in 2-3 foot lengths
- Several “spiles” or taps
- Cheesecloth or a fine plastic mesh “sleeve” to filter sap before boiling
- Wire for attaching buckets to the trees
- 3/8″ drill bit for drilling a hole in the lid to thread the tubing in. Don’t use rusty bits.
- 7/16 or 1/2″ drill bit for drilling the tree. Don’t use rusty bits.
- Blue tape to mark your drill bit. Wrap the tape at the 2 1/2″ mark on the drill bit, and don’t drill past that mark.
- Rechargeable drill. I only had an electric drill, and as I found out later, it would have been a much better idea to get a drill with rechargeable batteries. I had to connect several extension cords across my lawn to get my drill to the trees.
- Making Maple Syrup by Noel Perrin or Backyard Sugarin: A complete how-to guide by Rink Mann. For a deeper dive into the ins and outs of the process of making maple syrup along with some other methods, check out one of these handy guides.
Steps for Tapping Maple Trees
1. Preparing and placing the buckets
I began this operation in the garage. I snapped the lids on the buckets, and using the 3/8″ bit, drilled a hole in the lid. Next, I threaded the tubing a few inches into the bucket. Then I added the spile to the other end of the tubing.
One tree at a time, I brought out the buckets. My husband helped me wire the handles of the buckets around the trees. I just put the buckets directly on the ground, but sometimes it was uneven, so we put stones or shims underneath to level it off.
Once everything was “staged”, it was time to drill.
2. Selecting appropriate trees
I had to measure the diameter of the trees because they need to be a minimum of 10-12″ at breast height, but I only drilled trees 14″ in diameter to be on the safe side. For every increase of 2″ in diameter, you can add another tap. The maximum is 4 taps per tree because you don’t want to stress the tree too much. The tree needs some of that sap to produce buds and leaves.
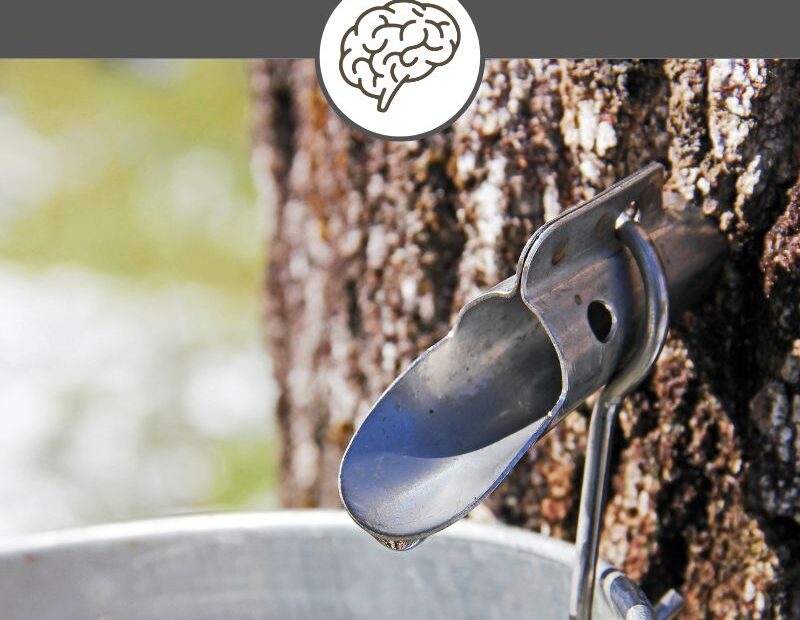
3. Drilling and inserting the spiles
Tap the SOUTH side of the tree. That is where the sap is going to start to flow first because that side of the tree warms up first. Move the next one over 4-6 inches up, down, or sideways. A good spot to tap is just above a large root or just below a large branch.
Do not reuse the same tap next year.
Bill drilled the first tap, the rest was up to me. (As a nurse, the saying goes: See one, do one, teach one.)
He held the drill at a slight upward angle so that the sap would flow downwards. The bark was drilled away first, followed by lighter-colored wood shavings. He stopped drilling when the tape mark on the bit reached the tree. We cleaned out the shavings and immediately, the sap began to drip.
Then, he gently tapped in the spile, just enough to be snug. You don’t want it to be too tight because you can split the wood. I could see the sap going down the tubing, and hear each drip hitting the empty bottom of the bucket. Then, it was my turn. Bill had his own trees to tap.
I ended up tapping 6 or 7 trees, but each had multiple taps in them. I actually had more maples available, but not enough supplies to do more, so this year, I doubled my capacity.
4. Collecting the sap
Once the trees were all tapped, every other day, I emptied the buckets and placed empty ones in their place. I couldn’t let them fill all the way to the top, because sap would slosh out of the hole in the bucket.
These buckets can be very heavy when full, especially when you are walking across snow and any icy driveway. If my husband hadn’t helped lug these buckets up from the yard, I don’t think I could have done it. I would have needed smaller buckets that didn’t hold as much sap. That would have meant daily trips in and out of the cold.
5. Boiling the sap
Every day for 3 weeks I boiled sap in my kitchen in my giant cooking pots, which, thankfully, I had found at a garage sale. The pots are 15 inches in diameter and 14 inches tall. Most people do this cooking process outdoors, but I wasn’t set up for that. However, I have a 6-burner cooktop with a heavy-duty hood to vent all that humidity.
Once the sap was indoors, we poured it into another bucket lined with plastic mesh. It caught any little bits of bark or debris that I didn’t want in my cooking pots.
Then the sap went into the large stainless pots on the stove.
It took an hour for the sap to boil down one inch in the pot. When it was boiled down part way, I added more sap.
Since I was adding sap as it boiled down, I can’t really say how much sap it took to make a pint or quart. I just did this day in and day out for about 3 weeks, about 12-13 hours a day. If I had to go to work, the sap had to go back in the garage and be kept cold.
Once it starts reducing, you can see the sap change from clear, to pale beige, honey-colored, amber, & then deep amber. I eventually went to smaller cooking pots as it reduced, and at that point, I could use a candy thermometer.
6. How do I know when my maple syrup is finished?
This short, 3-1/2 minute video demonstrates how to test the quality of your homemade syrup using three different tools.
According to the USDA, unopened maple syrup lasts for a year or more, when stored in a cool, dark location. However, many people report their unopened bottles lasting much longer than a year.
Opened maple syrup can spoil, so after opening, store it in your refrigerator and use it within one year of when it was opened. In the freezer, it can last indefinitely. Also, it won’t freeze but will maintain a slushy consistency.
A Final Word
Tapping maple trees, collecting the sap, and making maple syrup is not only a fulfilling experience but also increases self-reliance. You don’t have to worry about supply chain issues disrupting your pancake breakfast! Plus, making maple syrup is not something that everyone can do; it’s unique and therefore potentially of great value for a side business.
Do you tap maple trees for maple syrup? Share your experience in the comments!
Originally published March 23, 2015; updated by the Survival Mom editors.
Mary is a graduate from Purdue University with an Associates in Applied Science. Her work experiences in Nursing have included surgery, dialysis, prison and drug rehab nursing.