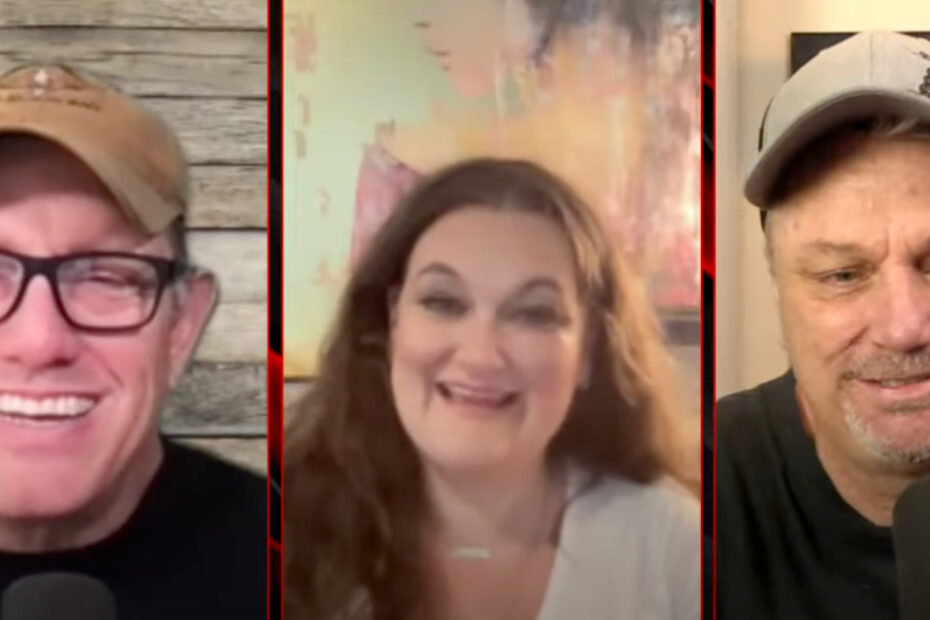
Category: Prepper News

  • Can You Stomach These Great Depression Meals?

    Can You Stomach These Great Depression Meals?

    [ad_1]

    Some of the links in this post may contain affiliate links for your convenience. As an Amazon associate I earn from qualifying purchases.

    What were the most popular Great Depression meals?

    Do you know?

    With all the talk about food storage and growing our own food, I did a little digging around to find out what food people ate during America’s Great Depression of the 1930s.

    Surprisingly, a few of these were made by my mother and grandmother, traditions, I’m sure, from those frugal years. Cookbooks like this one document many of these meals.

    I still have a soft spot in my heart for Chipped Beef on Toast!

    wrinkled hands using wooden spoon to stir food in blue bowl; great depression meals

    As you read this list, you’ll notice how simple and basic they are.

    Sandwiches are featured prominently, which is a reminder of how important it is to have bread-making skills. It makes sense for fresh bread to be a key component of a Great Depression menu when you think about the cost. A single loaf of homemade bread might cost much less if you could buy and stock up on staple ingredients like flour, yeast, and salt.

    Frugality meant survival.

    In addition, the Great Depression was followed by World War Two when many food items were rationed. As a result, this way of approaching meals and cooking influenced multiple generations.

    But remember that the limited availability of food happens for many reasons. Therefore we should be prepared because we don’t know what might cause it for us.

    Great Depression Meals

    How many of these are familiar to you, and do you have any others to add to the list?

    Sandwiches

    • Milk toast
    • Chipped beef on toast
    • Cucumber and mustard sandwiches
    • Mayonnaise sandwiches
    • Ketchup sandwiches
    • Lard sandwiches
    • Bacon grease sandwiches
    • Sugar sandwiches
    • Onion sandwich – slices of onion between bread
    • Butter and sugar sandwiches
    • Fried potato peel sandwiches
    • Tomato sandwiches
    • American cheese sandwich: ‘American’ cheese was invented because it was cheap to make and didn’t require refrigeration which many people who lived during this era didn’t have.

    Animals

    Soups and Salads

    Soups were easy to stretch to feed more people by adding water.

    • Potato soup – water base, not milk
    • Dandelion greens salad
    • Bean soup
    • Rag soup: spinach, broth, and lots of macaroni

    Foods on Bread or Toast, With Gravy/Sauce, or Both

    • Tomato gravy and biscuits
    • Gravy and bread – as a main dish
    • Toast with mashed potatoes on top with gravy
    • Creamed corn on toast
    • One-eyed Sam – a piece of bread with an over-easy egg in the center
    • Tomato gravy on rice
    • Toast with milk gravy
    • Warm canned tomatoes with bread
    • Sliced boiled pork liver on buttered toast (liver sliced with a potato peeler)
    • Fried potato and bread cubes
    • Hard-boiled eggs in white sauce over rice

    Porridges

    • Oatmeal mixed with lard
    • Corn mush with milk for breakfast, fried corn mush for dinner
    • Butter and grits with sugar and milk
    • Runny eggs with grits
    • Cornmeal mush

    Foods in Milk

    • Cornbread in milk was a favorite Great Depression meal.
    • Rice in milk with some sugar
    • Banana slices with powdered sugar and milk
    • Popcorn with milk and sugar – ate it like cereal
    • Hot milk and rice

    Fried Foods

    • Fried potatoes and hot dogs
    • Water fried pancakes
    • Fried bologna
    • Garbanzo beans fried in chicken fat or lard, salted, and eaten cold

    Noodle and/or Bean Dishes

    • Hot dogs and baked beans
    • Beans
    • Spaghetti with tomato juice and navy beans
    • Spam and noodles with cream of mushroom soup

    Other Depression-Era Meals

    Desserts

    Lessons Learned From These Great Depression Meals

    Here are some of my takeaways from this list:

    1. Some foods that would normally have not been eaten became commonplace at the kitchen table.
    2. Stock up on ingredients for bread, including buckets of wheat, and know how to make different types of bread. Bread, in some form, is one of the main ingredients for many of these meals. Since I get a lot of questions about the types of wheat I use in my own cooking and food storage, check out my wheat tutorial here to learn more.
    3. Keep chickens around as a source of meat and eggs, and if possible, have a cow or goat for milk.
    4. Know how to make many different foods from scratch. Otherwise, the first three don’t make as much sense.
    5. Stock the right food (for you) and store it the right way. Many people start stocking up on food but aren’t sure if they are storing the right food, the right way, or what the right way is. Consequently, their food storage doesn’t serve its purpose well. Whether for Great Depression meals or not, no one wants to buy food storage, just to have it go bad because it wasn’t stored correctly. Therefore, learn exactly what to store and how to store it here! And if you want to get started with the basic building blocks of food storage, these are the top 10 foods I recommend.
    6. Cultivate a garden to provide at least some fresh produce, and plant fruit trees and bushes. You may be interested in this article with tips for Planning an Edible Landscape.
    7. Don’t waste anything, even chicken feet!
    8. Develop a survival mindset, a critical skill we all need to cultivate.
    9. Save fat, lard, and bacon grease.
    10. Tasty food doesn’t have to require expensive ingredients.

    How many of these things do you think you could incorporate into your daily life? Or what about some of this great depression wisdom?

    Lessons learned from the Great Depression? Don’t waste anything, not even chicken feet! Click To Tweet

    Nutrition in Depression-era Meals

    As you can imagine, good nutrition was a distant memory as subsistence diets became the norm for many. Consequently, malnutrition and the accompanying vitamin deficiencies were prevalent. This article from the archives discusses how people tried to maintain their health during the Depression.

    More Interesting Facts about Depression-era Food

    • Until it was pointed out by Jane Ziedgelman and Andrew Cole, authors of A Square Meal: A Culinary History of the Great Depression, I hadn’t realized something that was staring me in the face when I look at pictures of depression-era breadlines. There are never any women in them. Have you noticed that? Turns out women made up about 25% of the workforce, and when layoffs happened, they got the ax first. And breadlines were a “distinctly male institution” with decidedly rough edges. Respectable women wouldn’t frequent a breadline.
    • As eye-raising as some of the foods on this list may sound to us today, we also gained Kraft Macaroni and Cheese; it officially launched in 1937. Kids everywhere now rejoice over the cheesy carbohydrate wonder.
    • Loaves were popular because you could make the ingredients stretch farther. Beyond the traditional meatloaf that still graces tables today, there were also versions made from lima beans and liver.
    • Creators William Dreyer and Joseph Edy named Rocky Road ice cream following the stock market crash in 1929. They hoped to make people smile during tough times.
    • Refrigerator ownership increased from 8% to almost 50%. However, that still means 50% of homes DIDN’T have refrigeration.

    Check out these Great Depression cookbooks:

    These books are a good place to start if you’d like to learn more about what people did to survive that difficult time.

    Conclusion

    In tough times, when a square meal is a memory, people become resourceful, inventive, and creative about finding frugal ways to stretch food supplies. And they limited waste. These meals are evidence of that and of people’s determination to survive.

    How many of these depression-era meals have you eaten?

    Updated; originally published 6/7/19.

    The following two tabs change content below.

    I’m the original Survival Mom and for more than 11 years, I’ve been helping moms worry less and enjoy their homes and families more with my commonsense prepping advice.


    [ad_2]

    Source link

  • How a Prepping Kit Can Help You Respond to Emergencies Faster

    How a Prepping Kit Can Help You Respond to Emergencies Faster

    [ad_1]

    (Psst: The FTC wants me to remind you that this website contains affiliate links. That means if you make a purchase from a link you click on, I might receive a small commission. This does not increase the price you’ll pay for that item nor does it decrease the awesomeness of the item. ~ Daisy)

    By the author of Prepper’s Pantry and Three Miles

    A common discussion around prepper tables is how and where to store all of your stuff. One method I like to use is making prepping kits that are geared to respond to certain types of emergencies or situations.

    The best example of a prepping kit that almost every prepper has is a bug-out bag. Our bags are geared toward providing us with what we need to survive for 24-72 hours away from our homes. In them, we keep food, water and filtration devices, lighting, navigation tools, emergency shelter supplies, and first aid gear. Because this is a standalone, contained set of gear organized for a specific purpose, we pare out the things that aren’t necessary for that type of emergency survival.

    But you can easily expand the kit philosophy far beyond the bug-out bag. Not only do prepping kits help you to respond quickly, they also help you plug any holes you might have for a particular type of event. You can quickly find the things you need in one place, instead of searching around in the dark with a flashlight clenched between your teeth.

    Here are just a few examples of the prepping kits you can create. Use this as inspiration to make kits that are most likely to be needed in your setting, for your family

    Power Outage Kit

    I keep a power outage kit in my hall closet, where it’s easy to find even on the darkest night. The kit is kept in a Rubbermaid container with a lid. In it, I keep the following:

    I keep extra fuel canisters and candles elsewhere, but I always have the basics together so I can function. Plugged in to keep it charged, I keep my small solar generator in a closet that has a plug, with the accessory package and the folding solar panels on top of it and behind it respectively.  The goal is to keep all of your related things together so you have all the bits and pieces you need to handle things quickly and efficiently.

    Water Kit

    I have another kit in a decorative cabinet that resides in my front hall. This is where I store all things water-related. This prepping kit is larger but neatly stashed away, and like the other kit, it contains the basics. Extra supplies are stashed elsewhere.

    In my water kit, I keep:

    The things you keep in your own water kit may vary and could also include things like testing strips for your well, a vessel for collecting water from an outside source, and other miscellaneous water-related supplies.

    Tornado Kit

    This is an example of a more regional kit a prepper might want to put together. Anyone who lives in tornado country knows that their immediate response could be the difference between life and death. When we had a house in a tornado-prone area, I kept my tornado kit in the part of the basement where we’d go if a twister was inbound. You might want to keep a similar kit in your storm shelter.

    Here’s what we kept in ours:

    • Helmets (any kind will do – including bicycle helmets, which are inexpensive and easy to acquire)
    • Water
    • Protein bars
    • A blanket to throw over ourselves to protect from debris
    • First aid supplies
    • Sanitation supplies in case we’re trapped in there for some time

    Your kit will vary based on where you live, how many people are likely to be sheltering, and any special needs you and your loved ones may have.

    What kind of container should you use for your prepping kit?

    You can use a variety of vessels for storing your prepping kits. Here are some examples of how I store my supplies.

    • Stackable Rubbermaid Totes
    • Suitcases slid under the bed
    • Small, decorative cabinets that are dedicated to one specific type of prep
    • A shelf in your pantry or hall closet
    • A nightstand or side table with drawers
    • A basket on a shelf

    The sky is really the limit when it comes to places in which you can compile a kit. The main goal is to keep things that you might need together, together. Often when you use the kit philosophy, you duplicate certain supplies. For example, I have a Sawyer Mini in my home water kit and my bug-out bag, and I also keep one in my purse at all times. But two is one and one is none, right?

    I prefer opaque containers for this purpose so that a casual glance doesn’t spy my preparedness supplies.

    The next time you have an emergency, you’ll be incredibly glad that you put the things you’ll need for it all in one place, where they were easy to find.

    For some thorough checklists, take a look at The Prepper’s Interactive Book of Lists.

    Do you use the prepping kit philosophy?

    Do you keep your prepping supplies dedicated to specific emergencies in one place? Can you share what type of prepping kits you have and what you keep in them? Let’s discuss the humble prepping kit in the comments section.

    About Daisy

    Daisy Luther is a coffee-swigging, adventure-seeking, globe-trotting blogger. She is the founder and publisher of three websites.  1) The Organic Prepper, which is about current events, preparedness, self-reliance, and the pursuit of liberty; 2)  The Frugalite, a website with thrifty tips and solutions to help people get a handle on their personal finances without feeling deprived; and 3) PreppersDailyNews.com, an aggregate site where you can find links to all the most important news for those who wish to be prepared. Her work is widely republished across alternative media and she has appeared in many interviews.

    Daisy is the best-selling author of 5 traditionally published books, 12 self-published books, and runs a small digital publishing company with PDF guides, printables, and courses at SelfRelianceand Survival.com You can find her on FacebookPinterest, Gab, MeWe, Parler, Instagram, and Twitter.


    [ad_2]

    Source link

  • The Pros and Cons of Your Three Main Options

    The Pros and Cons of Your Three Main Options

    [ad_1]

    Water is a precious commodity and always has been, which is why people have been using wells to access underground water for thousands of years.

    Despite technological developments, there remain just three basic types of well.

    #1 The Dug Well

    digging well with augur

    To create this type of well, you dig until you hit water and then extract that water by hand using a bucket and pulley system. 

    The oldest and simplest type of well, the dug well requires little more than a couple of shovels and some serious muscle power. This type of dug well needs to be at least two feet wide to give the person digging it enough space to maneuver. 

    You can dig your own shallow well using a pick, shovel, and a bucket on a pulley to remove the dirt. It’ll go quicker if you’ve got some slightly more advanced tools like a post hole digger or augur. 

    Although digging a well isn’t rocket science, it is potentially dangerous.

    Not only could the sides of the well cave in, but because dug wells tend to be quite shallow, they’re easily contaminated by surface run-off. This may contain chemicals, and other contaminants, including overflow from sewers and septic tanks. 

    Another downside of being shallow is that your well is more likely to dry up during arid periods or times of drought.

    See these posts for further information:

    #2 The Driven Well 

    Digging driven well

    A driven or sand-point well is constructed by driving a narrow pipe into shallow water-bearing gravel or sand. To create a driven well, a steel pipe with a diameter of 1¼ inches to 2 inches is driven into the ground. At the bottom of this pipe is a filtration screen attached to a hardened steel tip. 

    Once the first length of pipe, with the steel tip, is driven into the ground, additional lengths are added until the first pipe hits an aquifer. 

    To make the process easier, a pilot hole is sometimes dug at the surface using an augur or post-hole digger. The drive port and well screen are then driven into the ground along with the first length of pipe. 

    A drive cap can be used to protect the well points and drive pipe threads during the construction process. This is particularly important if you’re using a weighted driving tool or “slam hammer.” 

    A driven well can only be constructed in a location where the geology and groundwater supply make it feasible. That means identifying an area of sand or gravel where the water table is less than 50 feet deep.

    The best way of doing this is by consulting geologic maps and surveys of your local area. You also need to establish if there is water available, which you can do by referring to the construction logs of nearby wells, or by consulting a geologist.

    Water dousing or divination can also help you find the best place to sink your well. 

    The ideal location for a driven well is higher than the surrounding groundwater and has good drainage. This will reduce the potential for contamination. 

    You should also identify any possible sources of contamination, such as areas where fertilizer is used intensively or where subsurface sewage seepage systems are in place. 

    According to the Illinois Department of Health, a driven well should also be

    “at least 10 feet from sewers, 50 feet from septic tanks, and 75 feet from sewage seepage fields.

    Driven wells are usually deeper than dug wells but, if constructed by hand, are rarely deeper than 30 feet. Machine-driven wells can be deeper but rarely exceed 50 feet. 

    Being so shallow, driven wells are more susceptible to contamination than drilled wells, but they also have some advantages. Driven wells are comparatively cheap to construct and can also be pulled out and moved, unlike a dug or drilled well.

    #3 The Drilled Well

    Digging drilled well

    Drilled wells or boreholes are the most common wells and the deepest. The average household drilled well is between 100 and 800 feet deep, but there are a few over 1,000. 

    A drilled well is constructed using a drill rig that bores into the ground 20 feet at a time. The first drill rods must pass through the “overburden” of dirt, rock, clay, and other material that sits on top of the bedrock. 

    Once the first 20 feet have been drilled, the next drill rod is added. This process continues until the drill hits water. 

    At the same time as drilling through the ground, the drill rig advances the well casing into the bored hole. This casing is usually around 6 inches wide and prevents dirt and other material from seeping into the well and contaminating the water. 

    As the casing is narrower than the bored hole, the space around it must be sealed using either cement or bentonite clay. Without this sealant, the water inside the well could become contaminated by water draining down from the surface around the outside of the casing. 

    We had a drilled well, or borehole, installed a decade ago, and it’s still going strong, producing a yield of around. 14,000 liters per hour. 

    The process of constructing a drilled well is expensive and nerve-wracking.  I remember counting each foot, knowing that each bit of progress was costing me an arm and a leg. Imagine my relief when they found water at just over 200 feet! If it had gone much deeper, I’d have been bankrupt! 

    If only I’d been able to read Diane Vukovic’s article on how much it costs to dig a well before I started. I could have saved myself a fortune!

    Aside from the expense of constructing a drilled well, there are a few other disadvantages. Being deeper than either the dug or driven well, a drilled well is more likely to remain productive throughout the year, regardless of rainfall. It’s also less prone to contamination, especially if it’s fitted with a watertight well cap. 

    That’s not to say that drilled wells never run dry or get contaminated. According to the US Environmental Protection Agency (EPA), six main contaminants affect private wells. 

    These include natural microorganisms washed into the well system by rainfall or snow run-off, as well as fertilizers and other chemicals from agricultural activities and fluoride which, it says, is “present in many aquifers.”

    Conclusion

    These are the three main types of well, although bored wells are sometimes included as a fourth. Bored wells are similar to drilled wells but are usually constructed in places where the water-bearing geologic formations are shallow and low-yielding. 

    A drilled well is the most expensive to install because it’s much deeper than either a driven or dug well but it’s much less susceptible to contamination. 

    Drilled wells also have a longer life expectancy and can produce clean water for between 30 to 50 years.

    Whatever type of well you opt for, some monitoring is necessary to keep it operational. This includes regularly testing the water quality, flow rate, and static water level. Monitoring your well can prevent well failure, potentially saving you money on emergency repairs. 

    Also see our guide to the different types of well pump.

    [ad_2]

    Source link

  • A Simple Guide to Off-Grid Dutch Oven Cooking

    A Simple Guide to Off-Grid Dutch Oven Cooking

    [ad_1]

    Some of the links in this post may contain affiliate links for your convenience. As an Amazon associate I earn from qualifying purchases.

    Guest post by Archie and Linda Dixon, authors of Just Dutch It!

    Have you ever wondered how you would cook when there is no gas or electricity for an extended period?

    Ice storms and tornadoes take out power lines for weeks. Earthquakes break natural gas and electrical lines. Hackers breach power grids and knock out power.

    All of these scenarios have happened. And any of these emergencies could happen to us today.

    So, how would you cook food?

    Enter Dutch Oven cooking.

    image: dutch oven cooking

    Why Knowing How to Cook in a Dutch Oven is a Valuable Skill

    Think about it.

    There’s not always sun to use your solar oven. The barbeque grill doesn’t bake bread very well, and that camp stove will run out of fuel if you have to use it for very long.

    The Dutch oven, however, is a multi-tasking genius.

    Long before refrigerators, gas stoves, ovens, microwaves, and instant pots, this versatile piece of cast iron cookware fed hardy folk. Cooks on cattle drives, pioneers crossing the plains, and even Lewis and Clark.

    Breakfasts, lunches, dinners, desserts, and baked goods are all within your grasp. It passes the off-grid cooking test!

    And what about fuel?

    Wood and buffalo chips are okay, but modern-day charcoal briquettes are the best. And, briquettes are easy to store and not dangerous in any way. Plus, if they get wet, you just dry them out before using them.

    What Kind of Dutch Oven Cooker Should You Buy?

    You need a “camp” type Dutch oven. This isn’t the kind you see in cooking magazines, but the kind you take camping and use for outdoor cooking. It’s made out of cast iron (there are also aluminum ones), has a flat bottom, and three short legs.

    The dutch oven cooker should have legs because these allow you to move briquettes in and out from under the oven, regulating the oven temperature. The lid has a raised rim around the edge so coals will stay on top while cooking, which is also important for proper cooking temperatures.

    Using one without legs is totally doable, however. You just have to deal with creating a stable base; legs take care of a lot of that for you.

    What size do I need?

    Now some important questions: What size do I need? How many ovens should I have? This is something you need to think about.

    A 12” oven is a good starting point. I also like a 14” and a 10”. With three ovens, you can cook your meals very quickly, although this could change depending on how many people you’re cooking for. This article will help you assemble and Dutch oven survival kit.

    You may also want to look at how deep they are as well. Deep ovens are useful for things like soup.

    Stack cooking is a great technique that maximizes your charcoal by stacking graduated sizes of ovens on top of each other. For example, you could stack a 14”, 12”, 10”, and a 5”. The charcoal on top of one oven becomes the briquettes underneath the base of the one stacked on top.

    How do I care for it?

    1. Wash your new Dutch oven (or the one you might have picked up at a yard sale) in hot soapy water and scrub off the protective wax or oil the manufacturer put on unless instructed otherwise. To do this, use a stiff brush or green scrubbing pad. Dutch ovens are iron and will rust if not kept dry, even for a short time. This will be the only time you should need to use soap on your oven.  Be sure to dry your oven quickly.
    2. Next, you need to “season” the oven. While still warm from washing, wipe the dry oven and lid with a lightly oiled paper towel or cotton cloth. Use regular vegetable oil. Don’t pour oil into the oven.  Instead, pour the oil onto a cloth, then wipe. After oiling the Dutch oven, place it in your kitchen oven on the bottom rack at 350 degrees with the lid ajar. Bake for one hour. You may get strange-smelling fumes, so open a few windows. Repeat this process two more times. Now your Dutch oven is ready to use. You’ll notice it has turned a golden color, but it will have a black shine after continued use.  This is what we want. If it does rust, just repeat the above process.
    3. After cooking in it, scrape out any remaining food with a spatula. When it has cooled slightly, put an inch or so of water in it and return it to the coals to boil and steam out the stuck food. After several minutes, remove it from the coals, and when it’s not too hot to handle, lightly scrub it with a brush or cleaning pad. Dry and lightly coat with oil, wiping off any excess.
    4. I always store my ovens with a small wad of aluminum foil under the rim of the lid. It’s also recommended to place a piece of paper towel or cotton cloth in the Dutch oven to absorb any moisture. If you don’t crack the lid with foil or something similar, I have found it very hard to get the cover off after it has been stored for a long time. Be sure to keep it in a dry place.

    Warning: Do Not Put Cold Water In A Hot Dutch Oven. It Could Crack!

    You will need several tools to begin cooking in your Dutch oven.

    • Lid lifter and/or long-handled tongue and groove pliers
    • Gloves
    • 16” or longer tongs
    • learn how to store charcoal.)
    • Vegetable oil and applying clothes or paper towels
    • Bricks for lid cooking

    Also, when cooking in your Dutch oven, it must be on a flat surface clear of dried weeds, grass, etc.  This is where a Dutch oven table is nice but not necessary. A 12” square concrete stepping stone is an inexpensive item to cook on. I recommend two, so you have one for the charcoal chimney.

    image: dutch oven cooking on a

    How To Cook In A Dutch Oven

    Once the briquettes are hot, what comes next?

    You’ll need to place the hot coals (they are ready to use when they have white ash on part of them) evenly spaced around in a circle the size of the Dutch oven. Then, place the top coals evenly spaced on the lid. Use the tongs to do this.

    Each recipe tells you how many briquettes to use. The basic rule is this. If it is a 10” oven, use 20 coals; use 24 coals for a 12″ oven, etc.  Just double the diameter of your oven, and that’s the number of coals you’ll need to cook with. This equals about 350 degrees.

    For a cooler oven (like needed for granola), use less; for a hotter oven (like with rolls), use more.

    When baking, you need twice as many coals on the top as on the bottom. This is because heat rises; therefore, more heat is needed on the top.

    With your Dutch oven, you can fry, bake, boil, or use the lid as a griddle.  Anything you cook in your kitchen oven or on the stovetop, you can cook with a Dutch oven!

    Now how about some recipes so you can start Dutch oven-ing! (That’s a word, right?)

    Recipes

    I would like to share our story about how we created recipes using only food storage items. My husband Archie decided we needed to write a book about cooking food storage in Dutch ovens. We had cooked many different foods in Dutch ovens: biscuits and gravy, upside-down cakes, cobblers, chicken with rice, beef stew, rolls, and even Chicken Cordon Bleu.

    But we didn’t have any recipes using just dried and canned food since that is what we had stored. In an emergency, the power could be out, and we wouldn’t be able to purchase food from the grocery store. There would probably be no fresh meats, no fresh vegetables or fruit, no fresh milk products, and no frozen microwave meals.

    We were pretty good at Dutch oven cooking, but I had never used just food storage items to cook with, nor even thought of cooking food storage in Dutch ovens.

    That’s when I got to work. I wanted to have recipes we were used to, so I got out some of my favorite recipes and modified them to use only food storage items.

    Here are some very basic recipes to get you started. Some alternate ingredients are also listed to make them healthier or tastier. I hope you like them!

    Chocolate Cake

    • 10” or larger Dutch oven, 8 or 9 inch round or square pan; serves 9
    • 24 – 26 briquettes; 10 on the bottom, 14- 16 on top; pre-heat 5 minutes; bake 30 minutes

    Good:

    1 ½ cups whole wheat flour

    1 cup sugar

    ¼ cup unsweetened cocoa

    1 tsp. baking soda

    ½ tsp. salt

    1 Tbsp. vinegar (white or apple cider)

    2 tsp. vanilla

    1 cup water

    1/3 cup oil

    Directions:

    Stir together the flour, sugar, cocoa, baking soda, and salt. Mix the vinegar, vanilla and water together and then add to the dry ingredients. Add the oil and mix well until smooth and creamy, about one minute. Grease and flour the pan, and pour the batter in the pan. Place pan on foil ring and cook for around 30 minutes. (check after 20 minutes). The cake is done when it has pulled away from the sides of the pan.

    Better:

    Use white flour in place of whole wheat.

    Best:

    Use melted butter in place of oil. Dust the top of the cooked cake with powdered sugar.

    Banana Bread

    • 12” or larger Dutch oven; 1 loaf
    • 24 briquettes: 8 on the bottom, 16 on top; cook 1 hour

    Good:

    1 cup sugar

    2 cups whole wheat flour

    ½ tsp. baking soda

    1 tsp. cinnamon

    ½ tsp. salt

    1 cup dried bananas, broken into tiny pieces, soaked until tender, and drained

    ½ cup oil

    ¼ cup reconstituted powdered milk

    1 tsp. vanilla

    Directions:

    Lightly grease loaf pan. Mix dry ingredients (first 5). Cream together the remaining ingredients, then add wet ingredients to dry. Mix well. Pour batter into pan. Bake on a foil ring for 1 hour. Check for doneness. Cook until done (bread has pulled slightly away from sides). Do not add more briquets.

    Better:

    Replace whole wheat flour with white flour.

    Best:

    Replace oil with butter or butter-flavored shortening. Replace ½ of sugar with brown sugar. Add walnuts.

    Note: You might say, “Banana Bread out of dried bananas?” Yes, this works really well. It’s better the next day, too, since the banana flavor has had time to permeate the whole loaf. Enjoy this one!

    Chicken Noodle Soup

    One of my favorites on a cold day is Chicken Noodle soup. Here is my version:

    • 10” or larger Dutch oven; serves 6
    • 20-25 briquettes, all on the bottom; cook 30 – 40 minutes

    Good:

    5 cups water

    2 cups egg noodles

    ½ tsp. garlic powder

    1 Tbsp. dried onion

    3 chicken bouillon cubes

    1-3 Tbsp. dried parsley

    1 tsp. salt

    ¼ tsp. pepper

    Directions:

    Bring 5 cups of water to boil over all the briquets in your Dutch oven. Add all ingredients, making sure the chicken is broken up into pieces. When soup boils again, remove half of the coals and simmer for 12-15 minutes or until noodles are tender.

    Better:

    Add 1 tsp. celery powder or 1 Tbsp. dried celery

    1 Tbsp. dried carrots

    Best:

    1 can chicken, liquid too

    Note: This soup has lots of noodles. If you like broth, cut back on the noodles or add more water and bouillon. Enjoy this with a slice of whole-wheat bread.

    Conclusion

    Dutch oven cooking is a versatile off-grid cooking option that anyone can learn. It can function with several different fuel sources and can cook a wide variety of foods. I highly recommend adding cooking with a dutch oven to your emergency preparedness skillset.

    What are your favorite foods to make in a dutch oven?

    Originally published on January 12, 2011, and has been updated.

    The following two tabs change content below.

    I’m the original Survival Mom and for more than 11 years, I’ve been helping moms worry less and enjoy their homes and families more with my commonsense prepping advice.

    [ad_2]

    Source link

  • How to Use 3 Simple Tools to Get Better Prepared FAST

    How to Use 3 Simple Tools to Get Better Prepared FAST

    [ad_1]

    (Psst: The FTC wants me to remind you that this website contains affiliate links. That means if you make a purchase from a link you click on, I might receive a small commission. This does not increase the price you’ll pay for that item nor does it decrease the awesomeness of the item. ~ Daisy)

    If you’re like most of us in the preparedness community, you’re feeling a sense of urgency to get ready like never before. We’ve gone through tense times in the past, but there’s a sense of impending doom permeating our country. Whether that’s caused by the floundering economy, the looming specter of World War 3, or concern that we’re facing a civil war within our own borders because we’re so greatly divided, the result is the same. You want to get your preparedness ducks in a row. NOW.

    You can read every prepping website on the internet but unless they’re talking about your exact situation, it’s not going to cover all your bases. I’ve created a bundle of interactive products that will help you get prepped specifically for your family in your location with your budget. Some of you may have purchased these products separately in the past. This article is about how to best use each of them to get prepped, ASAP.

    Please note that this isn’t just for beginners. It’s also for people who have been at it for a long time. You can check off all sorts of boxes, do some inventory, and identify any gaps you may have. I strongly urge you all to get serious and spend some time working on your personal preparedness as soon as possible.

    The Workbook

    The Prepper’s Workbook is designed to help you identify the threats you could face, the specific variables that could alter your plans, and the time, money, and space you can invest. This workbook is also available in course form for even more guidance.)

    The workbook includes quizzes and questionnaires to help you create the following plans:

    • A Most-Likely Disasters Plan
    • A Networking Plan
    • A Special Needs Plan
    • A Water Plan
    • A Food Plan
    • A Storage Plan
    • A Power Outage Plan
    • A Cold-Weather Plan
    • A Hot-Weather Plan
    • A Hunker-Down Plan
    • A Bug-Out Plan
    • A Self-Reliance Plan

    Once you have this information, unique to you, then you can proceed to the next step and put your plans into action.

    The Lists

    The Prepper’s Interactive Book of Lists is a PDF that you can type in directly. This product guides you through checklists and inventories to handle all sorts of emergencies. You can pick and choose among more than 40 lists to identify the things that are relevant to you.

    Use this book as a shopping list, a checklist, and an organizational tool. You can print it all out or only the pages you need. You can store it on your computer, on a USB, or in the cloud so you can access it anywhere, any time. (Wherever you store this deeply personal information, please encrypt it or protect it with a password. If you prefer old school, print it out and put it in a looseleaf binder. (It’s designed with space for the binder clip holes.)

    Here are some of the things included.

    • General supply lists that every prepper needs
    • Food checklists
    • Medical supply lists
    • Lists for specific emergencies like hunkering down, nuclear disasters, vehicle emergency kits, or civil unrest
    • Action checklists to prep for evacuations, home inventory, pantry inventory, and prepper skills
    • Personal information packets for each family member with health info, important documents, legal documents, important phone numbers, accounts, and property deeds.

    This product will help you to get organized and ready for anything.

    Action Steps

    Be Better Prepared in 28 Days is an actionable guide to help you take simple steps to be better prepped in just a single month.  You’ll be able to break things down into simple, manageable tasks that help take the overwhelm out of prepping.

    Here are some of the thought exercises, organization, and a few very small purchases that will jumpstart your preparedness (or audit your existing preps.)

    • Simple (and FREE) ways to build your water storage
    • How to determine your most likely disasters
    • What to eat (and how to cook it) when the power is out
    • Sanitation when the toilet won’t flush
    • Organizing what you already own to be better prepared
    • How to prep for an evacuation
    • Information that preppers must keep close at hand
    • How to find local edibles
    • How to test your food stockpile
    • The best emergency lighting sources for you

    Use this product in conjunction with the Book of Lists and the Workbook to maximize the value of all three products.

    Save money by getting them all in a convenient bundle.

    You can get all three of these products, valued at more than $60, for only $35 this weekend, in one convenient bundle. Use the strategy outlined in this article to buckle down and get serious. I firmly believe that things are about to get a lot more difficult for any of a variety of reasons. We need to focus our efforts effectively and make sure that we’re prepared to thrive independently and take care of our families, no matter what happens.

    Go here to grab your interactive bundle.

    Your purchase helps to support this website and our writers. Thank you, from all of us.

    [ad_2]

    Source link

  • 9 Underground Bunker Plans To Consider

    9 Underground Bunker Plans To Consider

    [ad_1]

    As climate change and global unrest promise more local and global catastrophes so, more people are considering having a subterranean world to escape to. 

    Although you can buy ready-made underground bunkers, these are often prohibitively expensive. Designing and building your own is a cheaper option and one you can achieve relatively easily, provided you can come up with some viable plans. 

    There aren’t a lot of underground bunker plans available for free, but you can get some useful ideas from companies manufacturing bunkers or using the plans for old bomb shelters and root cellars as a basis for your design. 

    Underground Bunker Plans

    #1 Septic Tank Design

    A concrete septic tank makes a sturdy base for a basic underground shelter and is cheap and comparatively quick to install. 

    Around 20% of all the homes in the US already have a septic tank installed, but that doesn’t help. If your septic tank is already trapping and filtering your toilet waste, you can’t go and live in it, but you could install another one as your purpose-built backyard bunker. 

    The most popular 1,500-gallon septic tank measures around six feet wide by 10 feet wide, giving you approximately 60 square feet of floor space. As you need around 10 square feet per person, this would give you a bunker big enough to house up to six people. 

    To make an underground bunker using a concrete septic tank, you can either order a pre-cast tank from a reputable manufacturer or build your own. 

    The average cost of a 1500-gallon pre-cast concrete septic tank is approximately $1,590, which is a lot cheaper than the average underground bunker. To give you a clearer idea, this 8’ x 12’ mini bunker carries a price tag of $45,500!  

    While you’ll struggle to transform a septic tank into luxury underground accommodation, you can make it safe and survivable.   

    To make the bunker safe, you need to add insulation and ventilation, but both these steps can be completed relatively easily using polystyrene insulation panels and 12v computer fans.  

    You can also install a basic plumbing system and lighting to make your underground experience more comfortable. 


    #2 Root Cellar Bunker Plan 

    root cellar

    It’s not only fruit and vegetables that can prosper in a root cellar – humans can also survive down there for months at a time. Our previous article on root cellars gives lots of useful planning advice and explores the pros and cons of various designs. 

    You can also find some useful root cellar plans here.

    With a little imagination, you can convert a basic root cellar into an underground or backyard bunker that offers a safe retreat when disaster strikes. 


    #3 Below Ground Corrugated Steel Culvert Shelter

    This plan for an underground steel bomb shelter dates back to 1962 and was created by the US Department of Defense. In its entirety, the document contains eight different types of shelter, each of which was designed “for use by families who do not have access to community shelters.”

    This shelter provides “fallout protection” against any radiation following a nuclear attack and is fire resistant. It’s designed to accommodate three people, but at a stretch, could house a family of four for at least a couple of days. 

    Read more about how to find your nearest fallout shelter.

    This design uses a pre-fabricated steel culvert, a little like those manufactured by Atlas Survival Shelters. Unfortunately, prices have changed a bit since 1962 and what would have once cost “$150 or less” will now cost around 10 times more. 

    You can create your own steel bunker using a 48” culvert pipe, but you’ll need a high-quality product if it’s to withstand the weight of the earth you put on top to conceal the bunker. 


    #4 Concrete Underground Shelter 

    A concrete underground bunker offers excellent protection against radiation, fire, and explosive shockwaves. To be effective, you need the walls of your bunker to be between one and three feet thick, which is going to increase your costs significantly. 

    Your underground bunker also needs to be about 10 feet underground if it’s to offer protection against a nuclear attack, so it’s no small undertaking. 

    The best way to approach a project of this size is to keep your plan as simple as possible.

    This is a good example of a basic plan for a concrete underground bunker. It’s similar to the pre-fabricated nuclear bomb shelters available online but should cost a lot less than $80,000 to construct. 


    #5 Wooden Underground Shelter 

    This video may be old, but it gives some very useful insights into designing and constructing an underground shelter out of wood. A concrete foundation gives the structure strength and integrity, while the wooden stud walls support the sides of the bunker. 

    Once complete, four people can squeeze into this underground bunker but probably wouldn’t want to stay in for more than a night or two.


    #6 Brick Underground Shelter 

    Another offering from the Department of Defense, this one is made of brick and structural clay masonry units. 

    Ideally built as part of a new house, this underground bunker can accommodate up to six people and should, if built correctly, last up to 30 years. 


    #7 Steel Bunker 

    This unusual series of videos was created for British television and gives step-by-step insights into building your own stainless steel bunker. 

    From the stainless steel sheeting used for the sides to the reinforced roof supports, it shows you how you can construct something very similar to an underground shipping container but far safer to utilize as a survival bunker. 

    Conclusion

    This article is designed to help you find a basic plan for your underground bunker and make the initial decision about what materials you’re going to use to construct it.

    Once you’ve decided on those, it’s time to read our article on cheap DIY underground survival bunkers

    This gives lots of useful tips on what your design needs to cover and some of the things that could go wrong if you don’t plan it right. 

    [ad_2]

    Source link

  • Will a Survival Garden Slowly Starve You to Death?

    Will a Survival Garden Slowly Starve You to Death?

    [ad_1]

    Some of the links in this post may contain affiliate links for your convenience. As an Amazon associate I earn from qualifying purchases.

    After being in the survival and prepping niche for more than 12 years, I’ve heard just about every survival strategy and tactic there is.

    One of the most popular is this, “Learn how to grow your own food.”

    And more recently, “Better get a garden started right now!”

    That isn’t a bad idea, but for the vast majority of people — like 75% or more –, it’s not only unrealistic but foolish to think you can grow enough food in a garden to sustain life.

    For most of us, relying on a garden for survival will be a bad bet. In this article, I’ll explain why.

    image: woman harvesting lettuce and green onions from her backyard survival garden

    What is a survival garden?

    A survival garden is just that—a garden upon which your family’s survival solely depends. No supplementing from a grocery store.

    It must provide both the necessary calories and nutrients. And it must do so for the long term–year after year–which means you also probably practice saving seeds to ensure you can plant a crop the following year.

    Now you can begin to see why this type of garden is problematic. Let’s take a closer look, though.

    “How much did you say I have to grow???”

    To maintain average health, the typical adult needs anywhere from 1600 calories to 2000 or more per day. The most popular and easiest to grow vegetables, like tomatoes, zucchini, and cabbage, have around 20 calories per serving. Clearly, the typical vegetable garden will not save anyone’s life.

    Let’s take a look at potatoes.

    They’re a lot higher in calories (160 for a medium potato), very versatile, and can store for long periods of time. To live on nothing but potatoes, you would need to grow around 6000 potatoes per person in a year.

    This can be done, but you’ll need at least an acre of land, growing nothing but potatoes, not to mention optimal growing conditions, farming equipment, fairly high-level skills, and knowledge.

    Have you ever tried to farm even just one acre? I never have, but I imagine it takes more effort than a few Square Foot Gardening boxes!

    Growing one or two other high-calorie crops will provide more variety, but you’ll also need more land. Of course, no one really wants to survive on just potatoes and maybe some corn or beans, so raising chickens, some rabbits, and perhaps a few goats seems like the way to go — but have you ever done that before? And maintained a couple of acres of crops at the same time?

    And how will you preserve all the food you grow and maintain healthy soil, so it keeps producing?

    On top of all that, the depletion of nutrients from soil is a significant issue. To keep your multi-acre survival garden producing enough food to prevent starving, you’ll need to factor in the right types and amounts of fertilizer.

    There are hidden expenses in all these endeavors that you usually won’t learn about until they suddenly become urgent!

    What a garden is good for

    Depending on a garden for survival is unrealistic for nearly everyone.

    An old farmer once told me, “It takes about ten years to get to know your land,” and even if all you’ve ever done is some container gardening, you probably agree!

    A more realistic plan for integrating a garden with your prepping plans might include:

    • Use it primarily to grow herbs and seasonings. These can easily be dehydrated and would be one less thing to purchase and stock.
    • Use it to grow seasonal vegetables and extend your growing season with a greenhouse, cold frames, and/or indoor garden with grow lights. Do what you can and enjoy the process.
    • Focus on the easiest and fastest-growing vegetables for your zone, grow as much as possible, and then preserve them with canning, pickling, and/or dehydrating. These will add fiber and nutrients to your other stored food.
    • Learn how to grow anything with the highest calories, and experiment with different crops until you find the one that best fits your growing zone, the amount of land you have, and your specific growing conditions. This vegetable garden size calculator lets you select both the number of people in your family and the type of food you want to grow.
    • If you live in an area prone to drought, take this into consideration! Some food crops require less water and smart techniques for using the water you have.
    • Use it to teach your kids and grandkids gardening and the love of nature.

    Personally, I use my garden as an excuse to get outside and into nature every single day. For me, that’s reason enough always to have some type of garden. I just don’t have any expectations that it will someday save my life with its bounty, or lack of, depending on the year!

    I’m not trying to discourage you or mock your survival plans.

    The plans we make ahead of difficult times and worst-case scenarios need to be made with the least amount of emotion and the clearest view of reality.

    I cannot stress that enough.

    Gardening can be incredibly expensive. In a time of inflation and unpredictable product shortages, this isn’t the time to pour money into something you hope will be life-sustaining, only to discover how impractical and difficult it really is.

    We’ve all heard stories about the $45 tomato. Maybe you’ve grown one of those yourself!

    Calories count.

    Nutrients and micronutrients are vital, but if there’s anything susceptible to the whims of Mother Nature, it’s growing food.

    Your time and resources are better spent on aspects of prepping other than gardening for survival.

    Will a survival garden keep you alive or slowly starve you to death? Click To Tweet

    So what is Plan B?

    Keep working on your garden and improve your skills and knowledge each season and with each seed planted — if you’re enjoying the process and have the time, money, energy, and manpower to continue. Expand your garden. Try new crops, but also integrate some of these into your plans and routines:

    • Learn to forage in your area.
    • Continue building your food storage, “stack it high and deep.” The plain truth is that ten cans of pinto beans will always be cheaper for the average person than trying to grow your own and a heck of a lot easier and faster.
    • Work towards a well-balanced food storage pantry. Minimum goal: 90 days worth of food.
    • Learn gardening skills through your county’s Master Gardener program. If your county doesn’t have one, find a county in a similar climate and growing zone, and see if you can take their course. Many courses are now online. Search for your county’s name + Master Gardener.
    • Investigate your area for a community garden where you can rent a small piece of land to grow more food or volunteer in exchange for a share of the harvest.
    • Look at this list of places to find free or nearly free food. Then, focus on what you can later preserve by canning, pickling, or dehydrating.
    • Visit a farmer’s market and see what crops and varieties they’re selling for ideas about what grows best in your area.
    • Get family and close friends involved. The more you all learn and cooperate together, the better the chances are that you can grow much, much larger amounts of food.

    Survival is more than just “get a garden started”

    Now you better understand the downfalls of relying solely on a garden to survive. I really do wish it were that easy!

    However, you’ve probably learned by now that “survival” is never one-size-fits-all, and there are always multiple layers for your plans and preps to be effective.

    What are your thoughts on the concept of a survival garden?

    The following two tabs change content below.

    I’m the original Survival Mom and for more than 11 years, I’ve been helping moms worry less and enjoy their homes and families more with my commonsense prepping advice.


    [ad_2]

    Source link

  • Taser Flashlight: Is it Worth It? Comparison & Review! (2022)

    Taser Flashlight: Is it Worth It? Comparison & Review! (2022)

    [ad_1]

    (Psst: The FTC wants me to remind you that this website contains affiliate links. That means if you make a purchase from a link you click on, I might receive a small commission. This does not increase the price you’ll pay for that item nor does it decrease the awesomeness of the item. ~ Daisy)

    By the author of  An Arm and a Leg and Zombie Choices.

    Talks with James over at PrepperBroadcasting.com have convinced me that it’s a good idea to possess non-lethal means of self-defense weapons as well as firearms. We live in a society today that is incredibly litigious, and there are some situations you could find yourself in where the ability to defend yourself without incurring a fatality could save you a lot of time and money in a courtroom/on legal fees.

    James is a big advocate of extendable batons, pepper sprays, stun guns, and the like. As a result, I picked up two different stun gun flashlights the other day that fall in line with James’ thoughts here.

    The first was the ZAP Stun Gun Flashlight, while the second was the Taser Strikelight, both of which are available over at TheHomeSecuritySuperstore.com.

    Taser flashlight
    More Emperor Palpatine shocky hands and less Luke Skywalker lightsaber hands.

    So, when faced with the prospect of needing to test two very shocky flashlights, I did the same that any other guy out there would do – I grabbed my brother and told him to close his eyes.

    Just kidding, just kidding.

    Stun gun flashlights are somewhat tricky to test.

    I suppose that’s one of the catches about trying to test out stun gun flashlight combos. You can’t really go around poking people with a stun gun unless you want to get marked off the Christmas present list.

    The first thing I did, though, was a test to see how the actual flashlight performed. This pretty much involved my walking around my house in the middle of the night with a flashlight. Right off the bat, it was easy for me to see that the ZAP was a brighter light. The Taser brand flashlight stun gun wasn’t anywhere near as bright as I was expecting it to be.

    So the winner here is clearly the ZAP when it comes to the more ultra bright led flashlight. There wasn’t even a contest.

    How quick can you deploy a stun gun flashlight?

    The next thing I tested was the main stun gun feature, the shock. How easy was it to “pull the trigger” when you’re in self-defense mode? Again, I found that the ZAP was superior. All you have to do with this model is use your thumb to flick the power all the way on and then press the round button. You instantly end up with electricity.

    The Taser brand required a bit more maneuvering. You have a safety switch on one side of the led tactical flashlight to prevent accidental discharge. Then, there is the “trigger” button on the other side of the stun gun flashlight. It took me a bit longer to get both switches done, and if you’re pulling this out of wherever you’ve stored it really fast, I can see how that would be an issue.

    taser flashlight
    You can see the gray button on one side and the yellow on the other here. I don’t think this is likely to be the best layout.

    And here is where I found the biggest flaw with the Taser Strikelight.

    There were many times that the Taser brand stun gun flashlight took 1-2 seconds to actually activate after you press the button. There were numerous times I couldn’t get the Taser stun gun to activate at all. Sometimes it would be an immediate electric jolt, but it by no means was it reliable for personal protection. The other taser stun gun works as soon as that button is pressed. Imagine having a gun that didn’t shoot until 2 seconds after you pulled the trigger. Could that create some problems?

    If you are in a situation where you actually have to use a taser light, you don’t have 2 seconds to fart around. It’s the equivalent of asking for a timeout in the middle of a gunfight.

    “Hold on, everybody! Hold on! I need you to hold still for the next two seconds, please. I’m going to make you poop your pants and leave you dazed on the ground.”

    (Want to know how to starve the beast? Read our free QUICKSTART Guide.)

    That being said, let’s take a closer look at the ZAP light.

    This thing looks like it came straight out of Luke Skywalker’s pocket. It looks like an angry lightsaber. There are big, nasty-looking spikes at the tip of this self-defense flashlight stun gun that basically tell you, “Jab me into a bad guy.”

    taser flashlight

    As soon as you pull this light out to use it, the bad guy is going to know that you have a shocky stick, and he’s likely going to rethink his life choices. To activate the light, as mentioned above, all you have to do is push the led flashlight button all the way forward (a good button layout, I think, because you would have a hard time pushing it halfway like the light feature is situated), and then press the big, black button.

    This will immediately cause the tip of the flashlight to let out a very large electric arc that audibly crackles violently. It’s pretty scary.

    Thankfully, the light comes with a wrist strap and carrying case that you can attach to your belt as well. The idea of just letting this light sit loose in my pocket doesn’t sit well with my gut. While this may surprise some people, I rather appreciate the notion of being able to walk down the sidewalk without suddenly collapsing to the ground in excruciating pain as my pocket taser electrocutes my leg.

    But, hey, I’m from The Beautiful South. We’re rather particular about things like that. Perhaps things are different where you live.

    taser flashlight

    There’s absolutely no way that you could carry this on your belt, though, without it looking as if you’re carrying an extendable self-defense baton on your hip. The profile is unmistakable. If you’re in a situation where you really don’t care if somebody sees you with a weapon on your hip, go for it. If you’re looking for a bit more “discretion” then I’m not really sure what you’re going to want to do here. Perhaps a coat pocket?

    I do have a few further thoughts on the Taser brand light.

    I question how far you would have to jab the Taser brand light into somebody’s skin for the metal to actually make contact as well. It’s recessed down in there further than I would have expected. Again, I didn’t actually get the chance to physically test this on anybody (they all turned me down), so maybe that distance doesn’t matter, but it is something I wonder about with this flashlight stun gun.

    Next, I think it somewhat strange that the Taser light specifically states in the manual that it’s not for hitting somebody with. I feel like if you’re using a flashlight with studded edges and the ability to shock the crap out of someone, that’s kind of the self-defense purpose, is it not? Why am I then told in the stun gun manual that it’s not?

    taser flashlight
    Why the studded edges then?

    My final thoughts on non-lethal self-defense?

    I definitely think that the concept is well worth your mulling over. You give yourself the ability to defend yourself in a variety of different ways with such and choose the level of escalation you’re going to resort to. If you’re comparing between the two above options, however, I recommend the ZAP light, hands down. The Taser model simply wasn’t reliable. There were far too many times that I pressed both buttons only to have nothing happen. Perhaps it was just a defective product I received, but I still think the design of the ZAP is superior.

    If you’re looking for other options, check out an extendable baton (they are illegal in some areas, so buyer beware), look into various pepper sprays, and definitely check out the shock light I mentioned above. It’s a valid concept that could easily help to keep you safe.

    What are your thoughts? Have you ever tried either of these taser flashlights? Have you ever actually used a taser on someone? Tell us about it in the comments section. (1stMarineJarhead, maybe you could fry up some rutabagas with these!)

    (Want uninterrupted access to The Organic Prepper? Check out our paid-subscription newsletter.)

    About Aden

    Aden Tate is a regular contributor to TheOrganicPrepper.com and TheFrugalite.com. Aden runs a micro-farm where he raises dairy goats, a pig, honeybees, meat chickens, laying chickens, tomatoes, mushrooms, and greens. Aden has four published books, The Faithful Prepper An Arm and a Leg, The Prepper’s Guide to Post-Disaster Communications, and Zombie Choices. You can find his podcast The Last American on Preppers’ Broadcasting Network.

    [ad_2]

    Source link

  • States, Counties and Places with No Building Codes in the USA: Comprehensive List 

    States, Counties and Places with No Building Codes in the USA: Comprehensive List 

    [ad_1]

    Even though building codes exist to protect people from dangerous construction, they can also be a huge hassle – especially if you want to build a home on a budget, live off-grid or use alternative materials such as cob or adobe.

    In most places in the USA, there is no getting around building codes (or the expensive permits and inspections process!).  However, there are still many places in the USA without building codes. 

    Here’s what you need to know about no building codes, as well as a list of counties in the USA without residential building codes.

    Places With No Building Codes Interactive Map

    Hover over each state to get a brief status. Click any green state to get more in-depth information.

    States without Building Codes

    There are 12 states in the USA which do not have statewide building codes or allow jurisdictions to opt out of the codes. However, this does not mean that you are free to build whatever you want in these states. 

    Many counties within the states have chosen to adopt codes.  For example, even though Delaware has no statewide residential codes, every county in Delaware has adopted a building code.

    1. Alabama
    2. Arizona
    3. Colorado
    4. Delaware
    5. Illinois
    6. Mississippi
    7. Missouri
    8. North Dakota
    9. Tennessee
    10. Texas
    11. West Virginia
    12. Wyoming 

    List of Places without Residential Building Codes in the USA

    Here is a comprehensive list of counties and local jurisdictions in the USA which do not have any residential building codes. 

    Important: I did not call every single county on this list. Also, laws are constantly being updated, so some of the counties may have enacted building codes since the time of writing.  There may be some inaccuracies! 

    Please let us know in the comments if you find an inaccuracy. Also, let us know of any counties without building codes that didn’t make this list.  It will be updated regularly! 

    Alabama actually does have statewide building codes.  However, they only apply to residential construction and certain types of commercial construction.

    Further, the Division of Construction Management does not have authority to enforce residential codes.  Instead, it is left up to the local counties.  If there is no local authority, then codes are enforced by the State Fire Marshall.  Read more here.

    Also read: Alabama Off-Grid Laws

    Below are counties that do not have local code enforcement in Alabama.  

    Arizona does not have any statewide building codes, but most larger towns and cities have adopted codes. 

    Currently, there is one county in Arizona without building codes.

    Also read: Arizona Off-Grid Laws

    Colorado does not have statewide residential codes. However, there are statewide codes that apply to factory-built homes and manufactured homes. The IBC applies to certain commercial and state-owned buildings. 

    Also read: Colorado Off-Grid Laws

    Counties with No building Codes in Colorado:

    Illinois does not have statewide building codes for residential buildings. Instead, it is up to local counties and cities to adopt codes. 

    Many places in the southern part of Illinois do not have building codes. Unfortunately, a lot of these places also don’t have websites where you can find that information – you’ll have to call each county individually to ask.

    You can find a directory of places that do have codes here

    Also read: Illinois Off-Grid Laws

    Places without building codes in Illinois:

    • Woodford County
    • Macoupin County 
    • Ogle County: The county does not have building codes but does enforce zoning laws.
    • Pope County
    • Gallatin County 

    Kansas has no statewide building codes besides the Kansas Fire Prevention Code and 2006 IECC for commercial buildings.

    Many counties have not adopted building codes at all, though building permits are usually still required.  Note that cities and towns in the counties below usually do have building codes. 

    Also read: Kansas Off-Grid Laws

    Counties without building codes in Kansas (click + to open)

    • Allen County
    • Anderson County
    • Barber County
    • Barton County
    • Bourbon County
    • Brown County
    • Chase County
    • Chautauqua County
    • Cherokee County
    • Cheyenne County
    • Clay County
    • Cloud County 
    • Coffey County
    • Comanche County
    • Cowley County
    • Decatur County
    • Dickson County
    • Doniphan County
    • Edwards County
    • Elk County
    • Ellsworth County
    • Finney County
    • Ford County 
    • Geary County 
    • Gove County
    • Graham County
    • Grant County
    • Gray County
    • Greeley County
    • Greenwood County
    • Hamilton County
    • Harper County
    • Harvey County
    • Haskell County
    • Hodgeman County
    • Jackson County
    • Jefferson County
    • Jewell County
    • Kearny County
    • Kingman County
    • Kiowa County
    • Labette County
    • Lane County
    • Leavenworth County
    • Lincoln County
    • Linn County
    • Logan County
    • Lyon County
    • McPherson County
    • Marion County
    • Marshall County
    • Meade County
    • Mitchell County
    • Montgomery County
    • Morris County
    • Morton County
    • Nemaha County
    • Neosho County
    • Ness County
    • Norton County
    • Osage County
    • Osborne County
    • Ottawa County
    • Pawnee County
    • Phillips County
    • Pottawatomie  County
    • Pratt County
    • Rawlins County
    • Reno County
    • Republic County
    • Rice County
    • Riley County 
    • Rooks  County
    • Rush County
    • Russell County
    • Saline County
    • Sheridan County
    • Sherman County
    • Smith County
    • Stafford County
    • Stanton County
    • Stevens County
    • Sumner County
    • Thomas County
    • Wabaunsee County
    • Wallace County
    • Washington County
    • Wichita County
    • Wilson County
    • Woodson County

    Mississippi has state-wide building codes but allowed local jurisdictions to opt-out.  Two that did are:

    • Warren County
    • Adams County

    If you know any other counties in Mississippi without building codes, let us know in the comments section! 

    Also read: Mississippi Off-Grid Laws

    Missouri has no statewide building code, and codes are adopted on the local level.  Many places outside of major cities have not adopted any codes, nor do they require permits.  You can find a list of counties without codes here.

    Also read: Missouri Off-Grid Laws

    Here are just some of the counties without building codes in Missouri:

    • Buchanan County
    • Douglas County
    • Jasper County
    • Lawrence County
    • Lincoln County
    • Newton County
    • Texas County 
    • Vernon County
    • Webster County

    Contrary to common belief, Montana does have statewide building codes. However, local jurisdictions are not required to enforce these codes.

    You’ll have to call the county to find out whether they enforce codes or not.  Because some counties are so small, this can actually be quite difficult. There often isn’t a website or a phone number to call.  You are also required to get a state permit before doing most types of construction.  More info here

    Also read: Montana Off-Grid Laws

    North Dakota has a state building code, but it does not require local jurisdictions to enact it.  If the jurisdiction does choose to enact a code, it must enact the state code. 

    Also read: North Dakota Off-Grid Laws

    The following counties in North Dakota do not have building codes:

    Tennessee has a very confusing building code system.  There are statewide codes, but jurisdictions can choose to enact their own building codes. 

    Further, jurisdictions can also vote to completely opt out of having codes.  When voting, they can choose to opt out of just unincorporated areas or just certain towns or cities. This has created a patchwork system of codes across the state.

    Voting to opt out occurs fairly frequently,  so there is no guarantee that your county will continue to opt out of having building codes. 

    Places that have not opted out of code can choose to enforce the codes themselves.  Or they can enroll in a program where the State Fire Marshal’s Office conducts inspections and enforces codes.  It uses local contractors for this.

    Even if your place in Tennessee doesn’t have any codes, you can still request an inspection from the Fire Marshall.  This allows you to get financing and insurance – both of which may require passing code inspection. You can get more info here

    Also read: Tennessee Off-Grid Laws

    Places in Tennessee without residential building codes are: 

    • Benton County
    • Auburntown
    • Carroll County
    • Cocke County
    • Parrottsville
    • Decatur County
    • Dowelltown
    • Slayden
    • Vanleer
    • Fentress County
    • Franklin County
    • Ardmore
    • Minor Hill 
    • Grundy County
    • Henry County
    • Puryear
    • Houston County
    • Humphreys County
    • Jackson County
    • Lawrence County
    • Lewis County 
    • Moore County/Lynchburg 
    • Perry County
    • Pickett County
    • Scott County
    • Huntsville
    • Stewart County
    • Van Buren County
    • Wayne County

    Texas has adopted the IBC, IEBC and IRC for residential dwellings.  However, in unincorporated areas, the code does not apply automatically; the area must specifically adopt a resolution ordering the code. 

    Further, jurisdictions are allowed to amend the code as they see fit.  As a result, many places in Texas still have no building codes or very relaxed building codes. Many areas also don’t enforce existing building codes.

    You’ll have to do some digging to find out which counties have building codes or not.  I suggest going to Wikipedia to get a list of Texas counties and filtering it by population.  The counties with the fewest residents tend to not have any codes at all. 

    Also read: Texas Off-Grid Laws

    Places in Texas without building codes:

    *There are probably many more, but I didn’t research them all.  Also, please double-check with these counties in case I made a mistake or the laws have changed!

    • Loving County
    • McMullen County
    • Borden County
    • Roberts County
    • Motley County
    • Foard County
    • Glasscock County
    • Stonewall County
    • Cottle County
    • Sterling County
    • Briscoe County
    • Throckmorton County
    • Oldham County
    • Armstrong County
    • Jeff Davis County 
    • Menard County 

    West Virginia has a state building code, but it does not require communities to adopt it or enforce it. As a result, many unincorporated areas in West Virginia have no building codes.

    You can find a list of places that have adopted the state building code here

    Also read: West Virginia Off-Grid Laws

    Here are some places in WV without building codes:

    • Monongolia County
    • Pocohontas County
    • Terra Alta County
    • Preston County 
    • Braxton County
    • Pendelton County
    • Calhoun County 

    Wyoming has building codes but leaves it up to local jurisdictions to adopt them.  As a result, there are still many places in Wyoming without building codes. 

    Also read: Wyoming Off-Grid Laws

    Some places in Wyoming without building codes are:

    • Johnson County
    • Fremont County
    • Crook County
    • Park County
    • Niobrara County
    • Hot Springs County 
    • Weston County

    How Are Building Codes Regulated?

    Most states have adopted a statewide building code that automatically applies to every community in the state. 

    Some states have a statewide code but let local jurisdictions decide whether they want to enact it (either through an opt-in or opt-out system). 

    And there are a few states which have absolutely no statewide building codes and leave it completely up to local jurisdictions.

    Residential vs. Commercial Building Codes

    Even in states with relaxed building codes, there are usually still codes for commercial buildings or certain types of buildings (such as schools and government buildings).

    In this article, we are going to focus on residential codes. Farm buildings are generally excluded from commercial building codes.

    No Codes vs. No Code Enforcement

    A lot of places do have building codes but just choose not to enforce them. 

    One example is Montana.  It regularly appears on lists of states without building codes when in fact, it does have statewide codes.  However, the state is so large and rural that most areas have no way of performing inspections or enforcing code. The same applies to Alaska and South Dakota.

    Even if a place does not enforce code, it is always a risk to build something not up to code.  You never know when the jurisdiction will hire inspectors to do enforcement – meaning you could suddenly face large fines for violations.  

    There are plenty of horror stories online from people who had this happen to them. Some were even forced to demolish their homes because there was no way to get them up to code. 

    Septic and Wastewater Codes Still Apply 

    Septic and “onsite wastewater” laws are enacted on a statewide level.  So, even if there are no building or plumbing codes in your area, you will still have to follow these laws.

    If you aren’t connected to the municipal sewer system, you will probably need a state wastewater permit and may need an inspection too.  It’s often impossible to get a building permit until you get your wastewater permit.

    Building Codes vs. Zoning Laws

    Building codes are very detailed rules regarding building practices. The goal is to ensure buildings are safe to live in. By contrast, zoning laws are more focused on how you can use your property. 

    The goal of zoning laws is to preserve the local culture, ensure complementary uses, and control development. 

    There is often some overlap between the two sets of rules.  For example, both building codes and zoning laws usually have minimum floor size requirements for dwellings. 

    Here are some examples of each.

    • Building code examples: Allowed materials, stairway heights, number of electrical outlets required, non-potable water labeling, baluster spacing
    • Zoning laws: Setback requirements, maximum building height, required number of parking spaces, whether you can have ADUs, number of permitted farm animals 

    Just because a place doesn’t have building codes, it doesn’t mean there aren’t zoning laws (and vice versa).   

    Problems with Not Building to Code

    Aside from the safety aspect of building a home that isn’t up to code, you can face some other problems if you don’t follow code.  They include:

    • Not being able to get financing for your build: This is rare, but some lenders consider it too risky to finance homes not built to code
    • Difficulty selling the home later on: Especially if the county has since adopted codes
    • County may enact code later on: You may then be forced to pay for very expensive upgrades to get your home up to code. 
    • Expensive building code insurance: This insurance covers costs to get your home up to code.  If your home isn’t built to code, this insurance will be expensive. 
    • Can’t use it commercially: Many places without residential codes do have commercial codes. If you ever want to open a commercial business in your home, you would have to get up to code first. 

    Know of other places without building codes that didn’t make this list? Or find an inaccuracy? Please let us know in the comments section.  We will update this list regularly.

    [ad_2]

    Source link

  • Urban Off Grid Living: Increase Your Self-Reliance

    Urban Off Grid Living: Increase Your Self-Reliance

    [ad_1]

    Some of the links in this post may contain affiliate links for your convenience. As an Amazon associate I earn from qualifying purchases.

    Admit it, you’ve been thinking about it.

    Late at night, at the end of a long day, you’ve pictured yourself living off the grid.

    Perhaps images of Little House on the Prairie come to mind. Or maybe you ponder becoming a long-bearded man living in the mountains, content to be a hermit. (Did anyone else watch Grizzly Adams?)

    You’re not alone in your thoughts, as more and more people are choosing an off grid lifestyle.

    Some can escape the noisy concrete city and move to quiet acreage in the Midwest or another idyllic rural area. For many like me, work and family obligations make that impossible.

    However, that doesn’t mean urban off grid living is beyond our reach. On the contrary, we can increase our self-reliance by learning practical ways for how to live off grid in the city.

    image: people in community garden because urban off grid living

    How can you live off grid in the city?

    Living off grid is defined as being self-sufficient of municipal utilities, such as water, natural gas, electricity, sewer, and trash services, raising your own food, etc.

    While you may not be completely independent in every aspect, it is possible to become more self-reliant.

    One advantage of adopting pieces of this lifestyle is knowing that you and your family can be prepared and survive quite well when a disaster happens.

    For example, many have saved money on their utilities and other purchases. Others have found peace and confidence in their newly learned skills along their path to grid-less-ness. In many respects, it parallels the idea of suburban homesteading.

    Can you live off grid in the suburbs?

    Same answer as above. Yes, but maybe not as fully. The focus for how to live off the grid—whether it’s in the city proper surrounded by concrete or in the ‘burbs where you may have a little more room—should still be on identifying ways to be less dependent on government services and local/global supply chains.

    However, off-grid living isn’t the easiest choice you’ll ever make, whether urban, suburban, or rural. Hopefully, you’ve not been conjuring up a romanticized version of happily churning your own butter and building an outhouse, although versions of these are possible.

    Let’s take a look at how to live off the grid in the city.

    Urban Off-grid Living

    The type of home is important

    The type of home in which you are living determines, in large part, the extent to which you can go grid-free. It’s easier to become more self-sufficient if you are in a home with a yard.

    Apartment life can accommodate a degree of off-grid living, though, just on a smaller scale. Think container gardening versus raised beds and five-gallon buckets versus 55-gallon rain barrels.

    More sustainable transportation

    An advantage for both types of homes is that everything you normally need in the course of a day or week is closer to home.

    • Walking or biking around town provides great exercise and saves money on gas, vehicle maintenance, and insurance. Bikes can be inexpensive and easy to repair. A wagon or cart can be added to haul items.
    • Public transportation, like the bus system, can be very economical. Try the various methods of transportation your city offers and learn what works best for you. Look into monthly passes; using them regularly may save you money.
    • Pay attention to where you go and its location. Combine trips, shop in your local neighborhood, and learn of new activities in your community for your family. Libraries, parks, swimming pools, local colleges, and recreation centers offer free or low-cost entertainment and activities.

    All of these options allow you to be less reliant on your gasoline/diesel-powered vehicles and fuel supply to your community. It will also help you to save money.

    Decreasing power grid dependence

    Being independent of all utilities may not be possible, but minimizing usage and creating your own power can be.

    Solar panels are one way to create your own electricity. They can be installed on various types of homes. Be aware that an entire house solar system will be tied to the grid and vulnerable to an EMP’s effects, should that ever occur.

    Another way to save money and energy is to minimize your electricity usage. Some easy suggestions are:

    • Unplug everything that isn’t currently being used. This helps you realize what you rely on the most. Then find ways of coping without that appliance, electronic, or whatever.
    • Learn about simple solar systems requiring deep cell battery system and solar panels. Apartment people, consider how you might incorporate solar energy into your lifestyle. Think outside the box.
    • Turn off the lights. Try to go for 48 hours without using any lamps or electric lights of any kind. This helps you figure out what kind of lighting you would need in a grid-down emergency.
    • Throw on an extra layer of clothing in the winter to stay warm.
    • Hand wash clothes.
    • Hang clothes on a clothesline.
    • Insulate your attic.
    • Wash dishes by hand.
    • Close unused air vents.
    • Swap regular bulbs with compact fluorescent light bulbs LEDs.
    • Try non-electric ways to stay cool in hot weather.

    Going off-grid with your water supply

    We use water for drinking, cooking, cleaning, and washing. Long-term drought conditions in the western half of the U.S. and other parts of the world reinforce the need to be wise about water usage. Less is better whether your water comes from a well or the city.

    Try some of these simple methods to conserve water and reduce the cost of water as a result:

    Short showers, maybe shower at the gym. A 5-minute shower can save you up to 1,000 gallons per month.
    Have a 5-gallon bucket in the shower to hold any running water while you find the right temperature for your shower. Use this water for plants or flushing the toilet.
    Keep a clean dishpan in the kitchen sink to hold the running water when washing hands and rinsing veggies. Use this water for your garden or for washing dishes.
    Install water-saving shower heads, faucets, and toilets.
    Collect rainwater.

    Increase your urban off grid food security

    Here are a few ways to begin minimizing your dependence on grocery stores.

    Grow your own food as much as possible.

    Growing some of your own food is an important part of urban off grid living.

    Start small with just one vegetable and one herb. If the plants don’t seem to be thriving, try using more or less water or a fertilizer (consult a nursery), but be sure to make notes. Growing food to any large extent is extremely difficult and can take years to master.

    image: growing basil and marjoram in containers for urban off grid living

    Apartment balconies can hold pots for vegetables, and you can build vertical growing systems. Plus, if you don’t have a balcony, there are many edible (and medicinal plants) you can grow inside on a windowsill or with grow lights.

    Sprouting is also a great option for apartment dwellers or others in small spaces. It doesn’t require outside space at all and very minimal inside space.

    In a home with a yard, you can plant in flowerbeds, allot a spot for a garden, or add containers for additional space. Learn how to vertical garden and utilize your home’s fence and exterior walls. Dwarf fruit trees might be an option for you.

    If you do not have the space for gardening, consider community gardens. They are a low-cost option and allow you to know your neighbors.

    Another option is to barter with a neighbor who does own property. In exchange for using their backyard for your garden, you’ll give them a percentage of the harvest and cover the cost of water, fertilizer, seeds, mulch, and the like.

    Keep chickens

    Chickens aren’t an option for those in apartments, but if you like eggs and have a little bit of outdoor space, consider a small brood of laying hens. It takes less space than you might think to keep chickens. I know of a suburban house that used a previously wasted strip of lawn beside their driveway to build a coop and run.

    Chickens are a commitment, though. Be sure you understand what your signing up for. And check your local laws, of course.

    Composting

    If you have room outside, use a composting system. If you don’t, a worm bin is a great indoor option. Let those red wriggles turn your scraps into compost for the food you grow. It’s not quite a closed system, but it’s closed-er. (I made that word up.)

    image: urban off grid living by composting with worm bin with tea spigot

    Here’s another composting idea for homeowners who want to level up their urban off grid living. Install a composting toilet in your home.

    Why are you looking at me like that? Yes, it can be done.

    And it’ll get you off the city’s sewer system, if you’re on it. It’s vulnerable to power outages if any part of it requires electricity, although in many cases, you can still flush it if you’ve got water set aside. A septic system is similar. Find out what you’ve got so you know how to approach power loss.

    Focus on skills

    As in suburban homesteading and completely off grid living, skill-building is crucial. Here are some to consider:

    Off Grid Urban Living for Beginners: Where to Start

    Don’t expect to suddenly become an urban off grid superhero. Be realistic. Think about what off grid means for you and which aspects are most important to you to try to incorporate.

    Then, start with something small. Taste success. Then choose another idea to implement. Be flexible. Perhaps you need to tweak an idea to make it work for you in your unique circumstances. That’s okay! Remember, achieving any measure of grid independence is a process. Take it one step at a time.

    Video: Living off the Electrical Grid in Washington, D.C.

    Fed up with fight the electric company over their bill, this couple decided to not buy the product anymore. They chose to shut off the power.

    Note: We can still learn from their urban off grid accomplishments even if we disagree with their worldview.

    Conclusion

    Choosing to become more self-sufficient and rely less on the grid can be an overwhelming thought. It’s a lifestyle choice, a commitment to use less, save money, and prepare, regardless of whether you’re in rural or urban areas.

    Choosing to live off grid in the city lets you benefit from the city amenities that you enjoy without being so tightly noosed to its vulnerabilities.

    And a bonus? You’ll find more money in your budget to stock up on food and other emergency supplies for your family as you implement off-grid urban living.

    Who knows? This may increase your savings so you can get those acres in your favorite rural countryside.

    In what ways have you tried to incorporate off grid principles into your urban lifestyle?

    *Check with city and county codes and zoning restrictions before going partial or off-grid.

    Guest post by Erin Foster originally published July 4, 1015, and has been updated.

    The following two tabs change content below.

    I’m the original Survival Mom and for more than 11 years, I’ve been helping moms worry less and enjoy their homes and families more with my commonsense prepping advice.

    [ad_2]

    Source link